

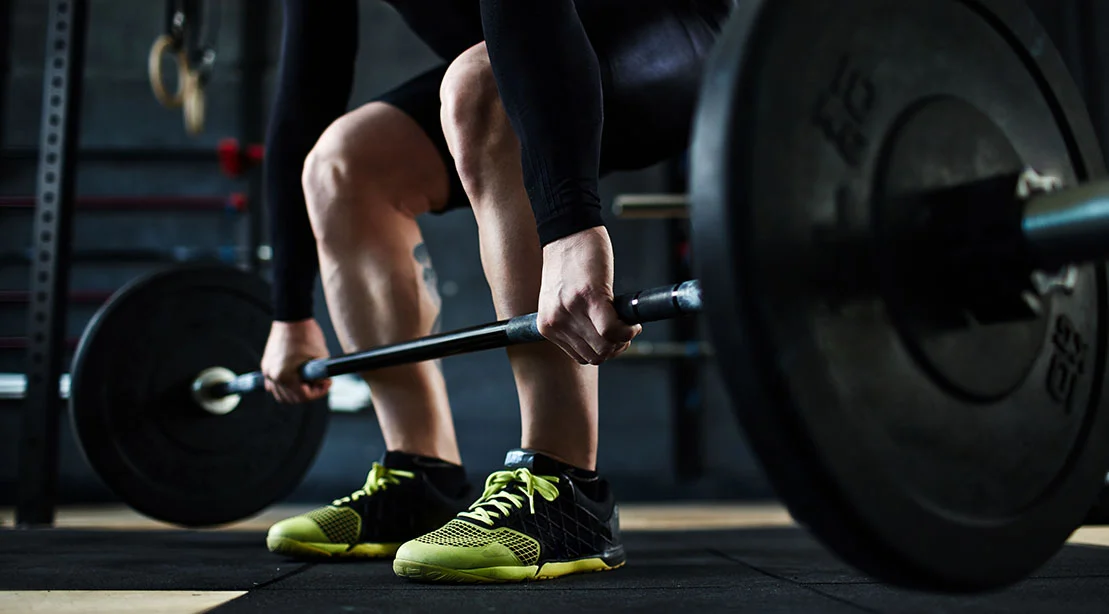
The deadlift is often heralded as the "king of exercises." It is a primal movement—the act of picking a heavy object off the floor and standing tall with it. Yet, despite its apparent simplicity, it is arguably the most technically demanding movement in a strength athlete’s repertoire. For many lifters, performance plateaus are not the result of weak glutes or hamstrings, but rather a catastrophic breakdown at the very first inch of the lift: the starting position.
If your setup is compromised, your potential for force production is severely throttled. Whether it is lumbar rounding, excessive knee drift, or a loss of lat tension, these errors turn an already difficult exercise into an uphill battle against your own mechanics. To lift heavy, safely and consistently, you must master the "bottom" of the deadlift.
The Anatomy of a Faulty Setup
To understand why the starting position is the make-or-break phase of the deadlift, we must look at the mechanical chain. When you approach the barbell, you are essentially creating a complex lever system. If any link in that chain—the hips, the hamstrings, the ankles, or the upper back—lacks the necessary mobility or stability, the body will inevitably compensate.
The most classic example of this is limited hip mobility. When an athlete cannot flex their hips sufficiently to reach the bar, the body often defaults to rounding the lumbar spine (the lower back). This not only shifts the load onto vulnerable spinal structures but also places the hips in a mechanically disadvantageous position, making the initiation of the pull sluggish and inefficient.
Other common pitfalls include "squatting" the deadlift, which involves dropping the hips too low and pushing the bar away from the midfoot, or failing to engage the lats, which allows the bar to drift away from the shins. These errors increase the length of the lever arm, effectively making the weight feel heavier than it actually is.
The Diagnostic: Can You Own the Bottom Position?
Before diving into corrective exercises, you must objectively assess your current capabilities. Strength coach Matt Wenning, a renowned expert in powerlifting and strength development, emphasizes that mobility without control is useless.
The Test:
Load a barbell with a standard 45-pound plate on each side. Step up to the bar so that it is perfectly centered over your midfoot. Hinge at your hips, reach down to grip the bar, and set your stance. Before you initiate the pull, hold that position for three full seconds.
While holding this static position, evaluate the following:
- Neutral Spine: Is your lower back flat, or is there visible rounding?
- Bar Proximity: Is the bar touching or nearly touching your shins?
- Tension: Can you feel your hamstrings loaded like a rubber band, ready to snap?
- Weight Distribution: Is your weight evenly distributed across the entire foot, or are you rocking onto your heels or toes?
- Shoulder Position: Are your shoulders slightly in front of the bar, or are they drifting behind it?
If you find yourself shaking, unable to maintain a flat back, or feeling like you are about to tip over, you have identified a critical bottleneck in your training.
The Pillars of a Clean Pull
A successful deadlift requires a symphony of physiological systems working in tandem. It is not enough to simply be "flexible."
1. Hip Flexion and Pelvic Control
The hips are the engine of the deadlift. Sufficient hip flexion allows the torso to hinge forward without forcing the lower back to round. Without this range, the pelvis remains locked, and the lumbar spine is forced to compensate, which is the primary precursor to injury.
2. Hamstring and Adductor Mobility
The hamstrings and adductors are responsible for stabilizing the pelvis and providing the leverage needed to drive the bar off the floor. If these tissues are chronically tight, you will struggle to reach the bar without your hips shooting up early, effectively turning a deadlift into a stiff-legged variation that lacks the power of the legs.
3. Ankle Dorsiflexion
While the conventional deadlift is a hip-dominant movement, it requires enough ankle mobility to allow the knees to track forward slightly. This ensures that the shins can move toward the bar, keeping the load centered over the base of support.
4. Thoracic Mobility and Lat Engagement
The upper back is the anchor of the lift. By engaging the lats—often cued as "squeezing an orange in your armpits"—you create a rigid upper torso that transfers force from the lower body directly into the bar. A mobile thoracic spine allows for a neutral setup, preventing the shoulders from rounding forward under heavy load.
Correcting Common Setup Mistakes
If your mobility is adequate but your lift still feels off, the issue is likely a technical error in your setup routine.
- The "Squatting" Deadlift: Many beginners mistake the deadlift for a squat. If your hips are too low, your knees will push the bar forward, ruining your leverage. The Fix: Hinge at the hips first. Think about pushing your butt back until you feel a deep stretch in the hamstrings, then bend your knees only as much as necessary to reach the bar.
- The High-Hip Hinge: Conversely, starting with hips too high turns the lift into a lower-back-dominant Romanian Deadlift. The Fix: Find the "sweet spot" where your shins touch the bar and your shoulders are just in front of the bar.
- The Bar Drift: If the bar is more than an inch away from your legs, you are working against physics. The further the load is from your center of mass, the more strain is placed on your spine. The Fix: Pull the bar into your shins before you break the floor. Engage your lats to "bend the bar" around your legs.
5 Mobility Drills to Optimize Your Setup
If you have diagnosed your limitations, these five movements—curated for their efficacy—will help you own the bottom position.
1. Chair Sumo Deadlift
As Matt Wenning notes, the chair is an excellent biofeedback tool. By using a chair as a target, you train your brain to sit the hips back rather than dropping them down.
- How: Stand in a wide sumo stance with a chair behind you. Hinge your hips back until your glutes gently touch the chair, then stand up. This forces the hips to move through their proper range of motion while maintaining stability.
2. Half-Kneeling Hamstring Mobilization With Ankle Rocker
This is a "two-for-one" drill. By kneeling on one leg and extending the other, you isolate the hamstring. Incorporating an ankle rock (pushing the knee forward over the toe) addresses the ankle mobility necessary to keep the shins vertical.
3. Goblet Prying Squat
Holding a kettlebell at your chest while in a deep squat allows you to use your elbows to pry the knees apart. This opens up the adductors and hips, providing the necessary space to reach the barbell without rounding the spine.
4. Rockback Breathing With Double-Elbow Reach
Often, overactive lats and low back muscles create "locked-in" tension that prevents deep, diaphragmatic breathing. This drill, performed on all fours, teaches the body to relax the spinal extensors, allowing you to establish a more neutral, stable spine before you even touch the bar.
5. Straight-Arm Band Pulldown Into Deadlift Hold
This drill bridges the gap between mobility and strength. By using a band to resist your lats, you learn to maintain tension in the upper back while performing the hinge movement. This trains the specific motor pattern required to keep the bar glued to your legs during the actual pull.
Implications for Long-Term Performance
The deadlift is not merely about moving weight; it is about moving weight with intention. By treating the setup as a skill to be mastered rather than a hurdle to be jumped, you minimize your risk of injury and maximize your strength potential.
The goal of these mobility drills is not to make you a contortionist, but to ensure that your body can operate within its strongest structural parameters. When you own the bottom of the deadlift, you create a foundation of tension that allows for an explosive, efficient, and—most importantly—safe pull. Remember: the deadlift doesn’t start when the bar leaves the floor; it starts the moment you decide to own the position.
 Jia Lissa
 Sagoh
Sagoh
 Nana Muazin
