
In the sprawling, atmospheric world of The Adventures of Elliot: The Millennium Tales, the journey to save the realm is as much about personal growth as it is about heroic deeds. While players are often preoccupied with the central narrative and the looming threats that define Elliot’s quest, the true backbone of your survival lies in the pursuit of Shards of Life. These elusive, glowing red fragments are more than mere collectibles; they are the literal building blocks of your character’s vitality.

Much like the iconic heart containers in the Zelda franchise, collecting these shards is essential for expanding your health pool. Understanding how to track them, where they are hidden, and the requirements for unlocking them is a pivotal skill for any adventurer looking to survive the increasingly difficult challenges presented by the game’s distinct ages.
The Mechanics of Vitality: Understanding Shards and Tears
At the core of Elliot’s progression system is a simple, yet rigorous, mathematical requirement: four shards combine to form one tear. Each "tear" acts as a single point of health, providing you with the resilience needed to survive combat encounters and environmental hazards.
The game features a hard cap of 20 tears, meaning that to maximize your character’s health, you must locate a total of 60 Shards of Life scattered throughout the world. This is no small feat. Because these shards are spread across multiple temporal "Ages," players must often revisit earlier areas once they have acquired specific movement or traversal skills, such as the dive ability, bombs, or the hammer. If you are aiming for 100% completion, preparation and exploration are your greatest assets.
Chronology of Exploration: The Four Ages
The Adventures of Elliot is divided into four distinct ages, each offering a unique environment, set of enemies, and hidden treasures. To help you navigate this complex map, we have categorized the shard locations by their respective age.

I. The Age of Safekeeping
This is where your journey begins. There are 16 Shards of Life to be found here. While the initial areas may seem straightforward, remember that some of these shards are locked behind environmental puzzles that require later-game skills to bypass.
| Map | Location | Description |
|---|---|---|
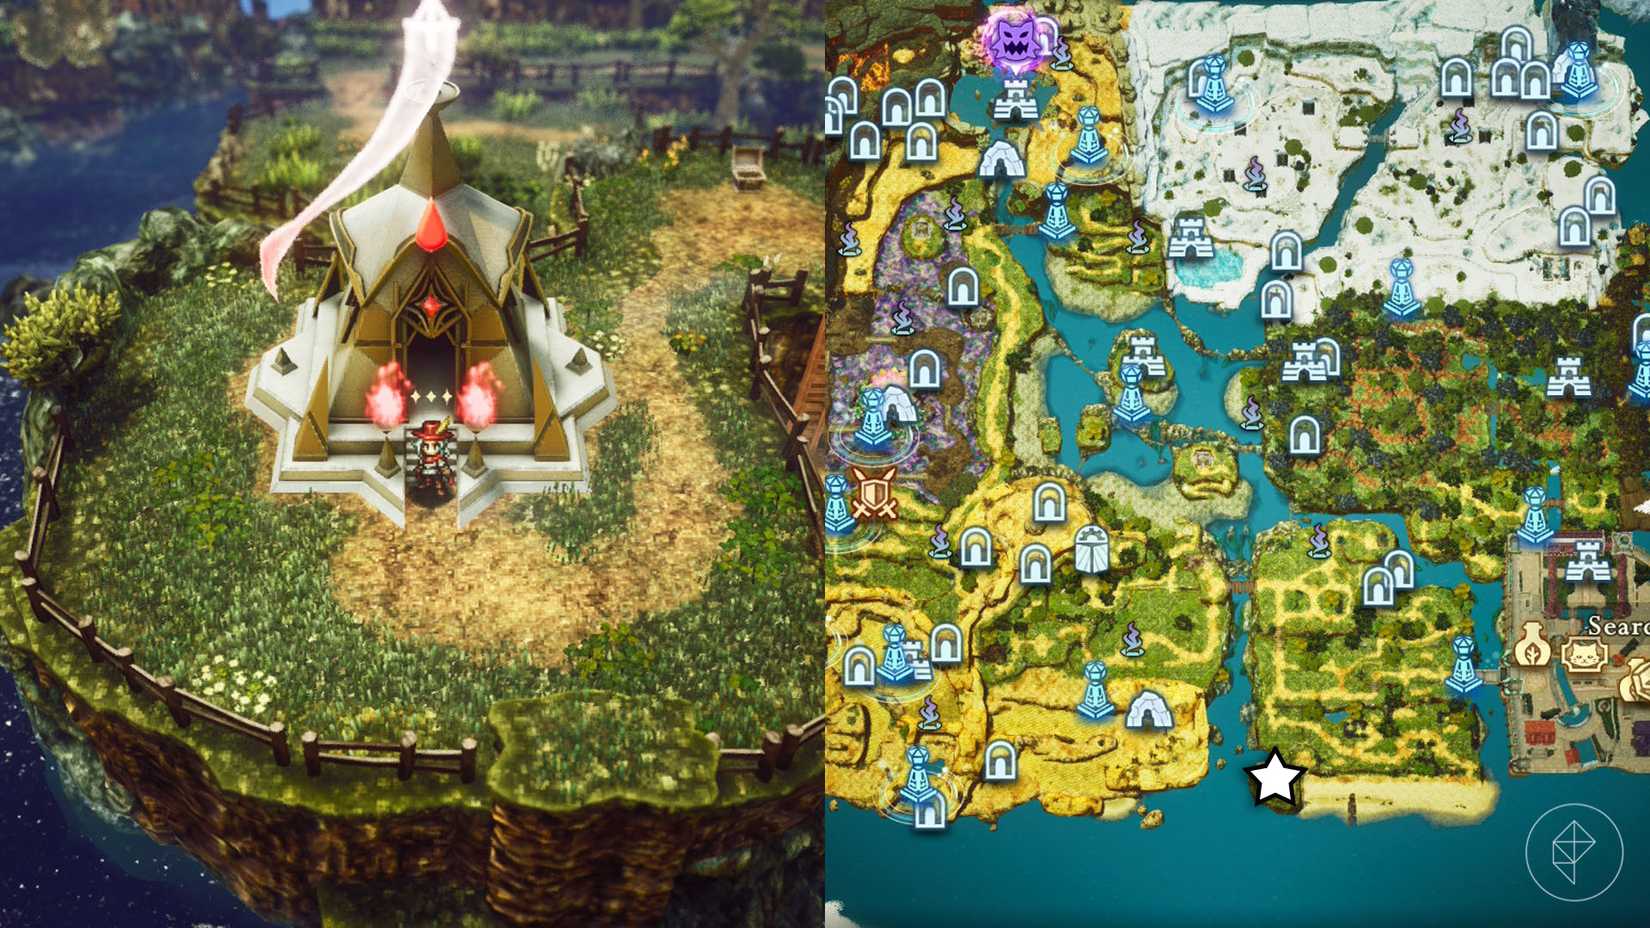
| Eastern Fields of Flon | Shrine of Life 1 | Located on the southwestern side of the Eastern Fields of Flon. |
| Western Fields of Flon | Behind Tree | Follow the path southwest through the old house ruins; check behind the tree near the locked door. |
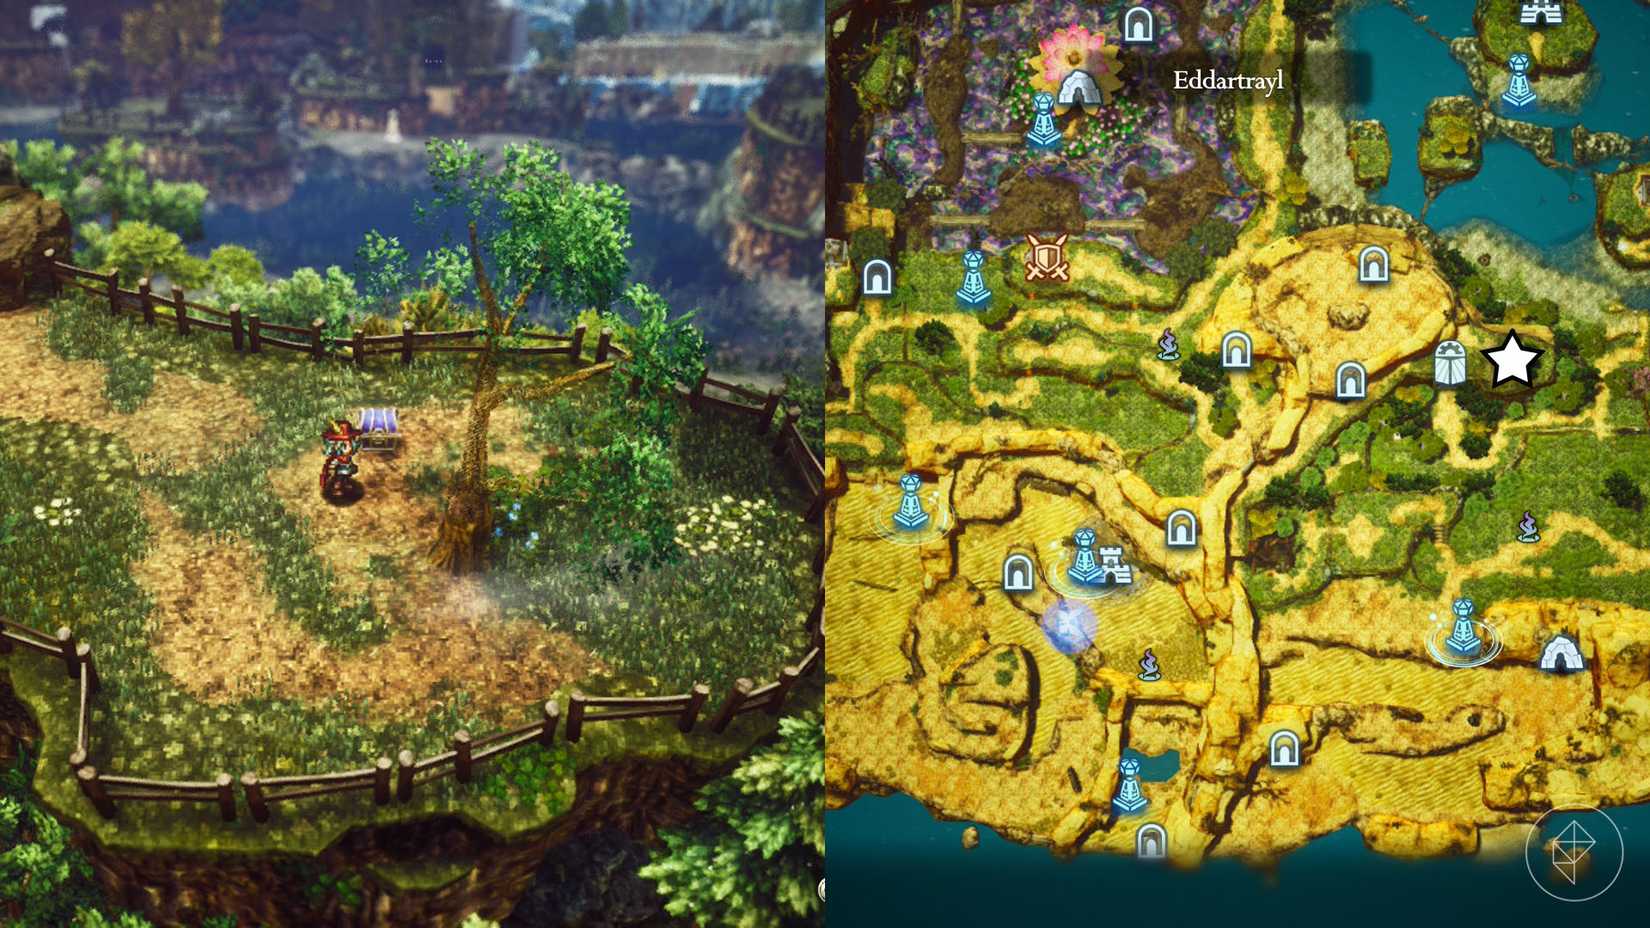
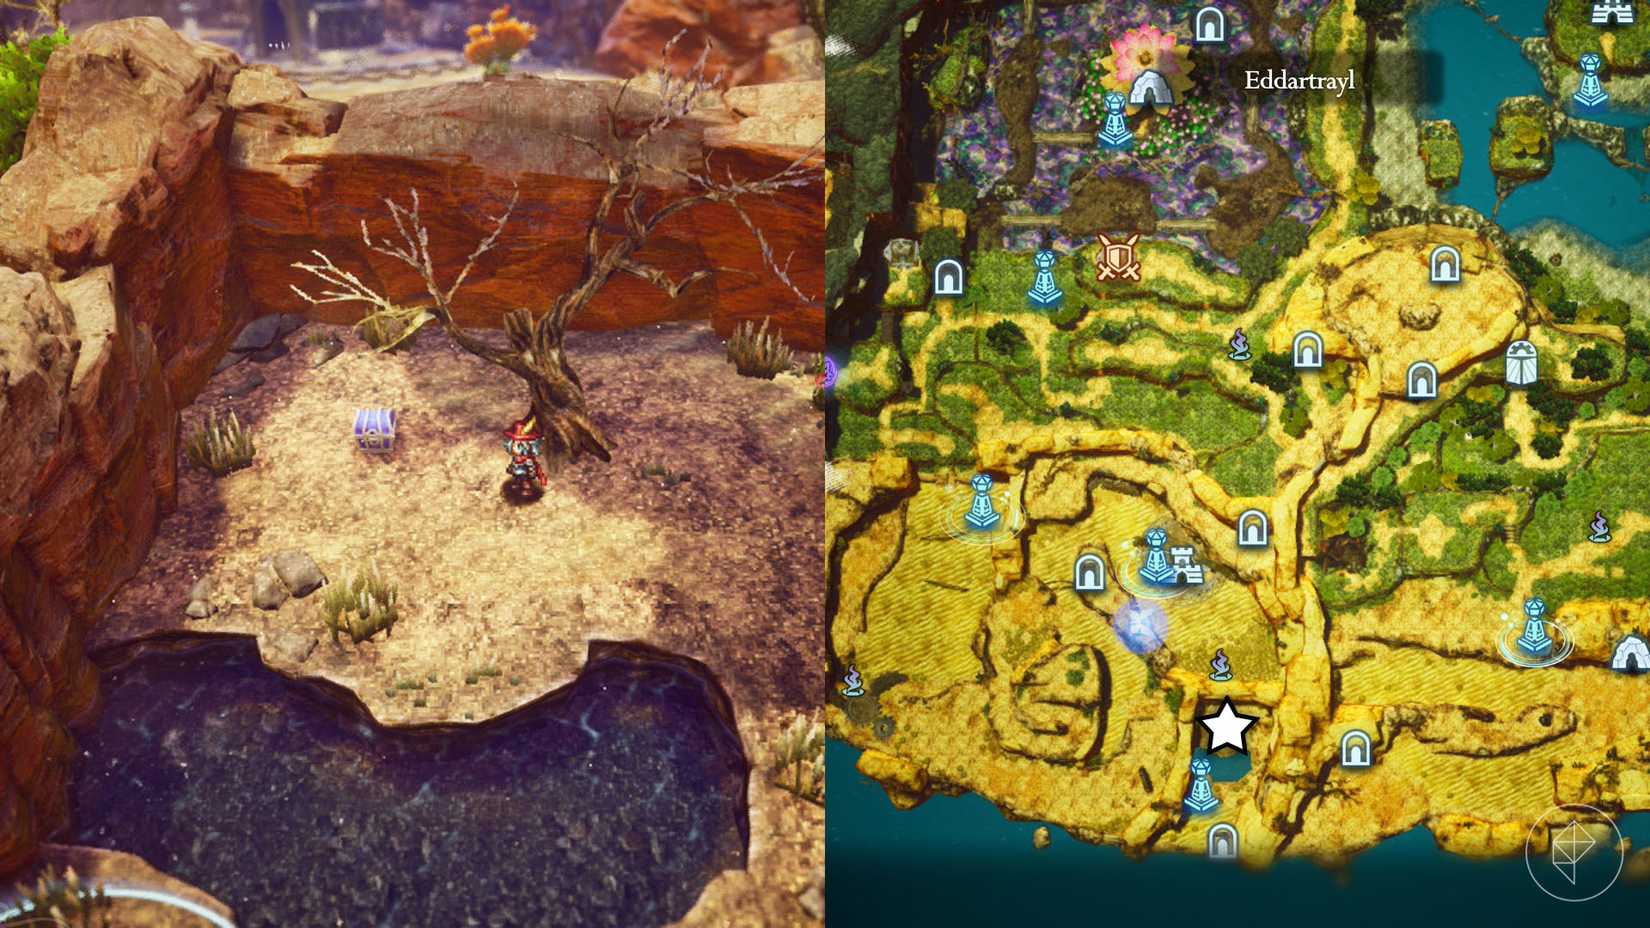
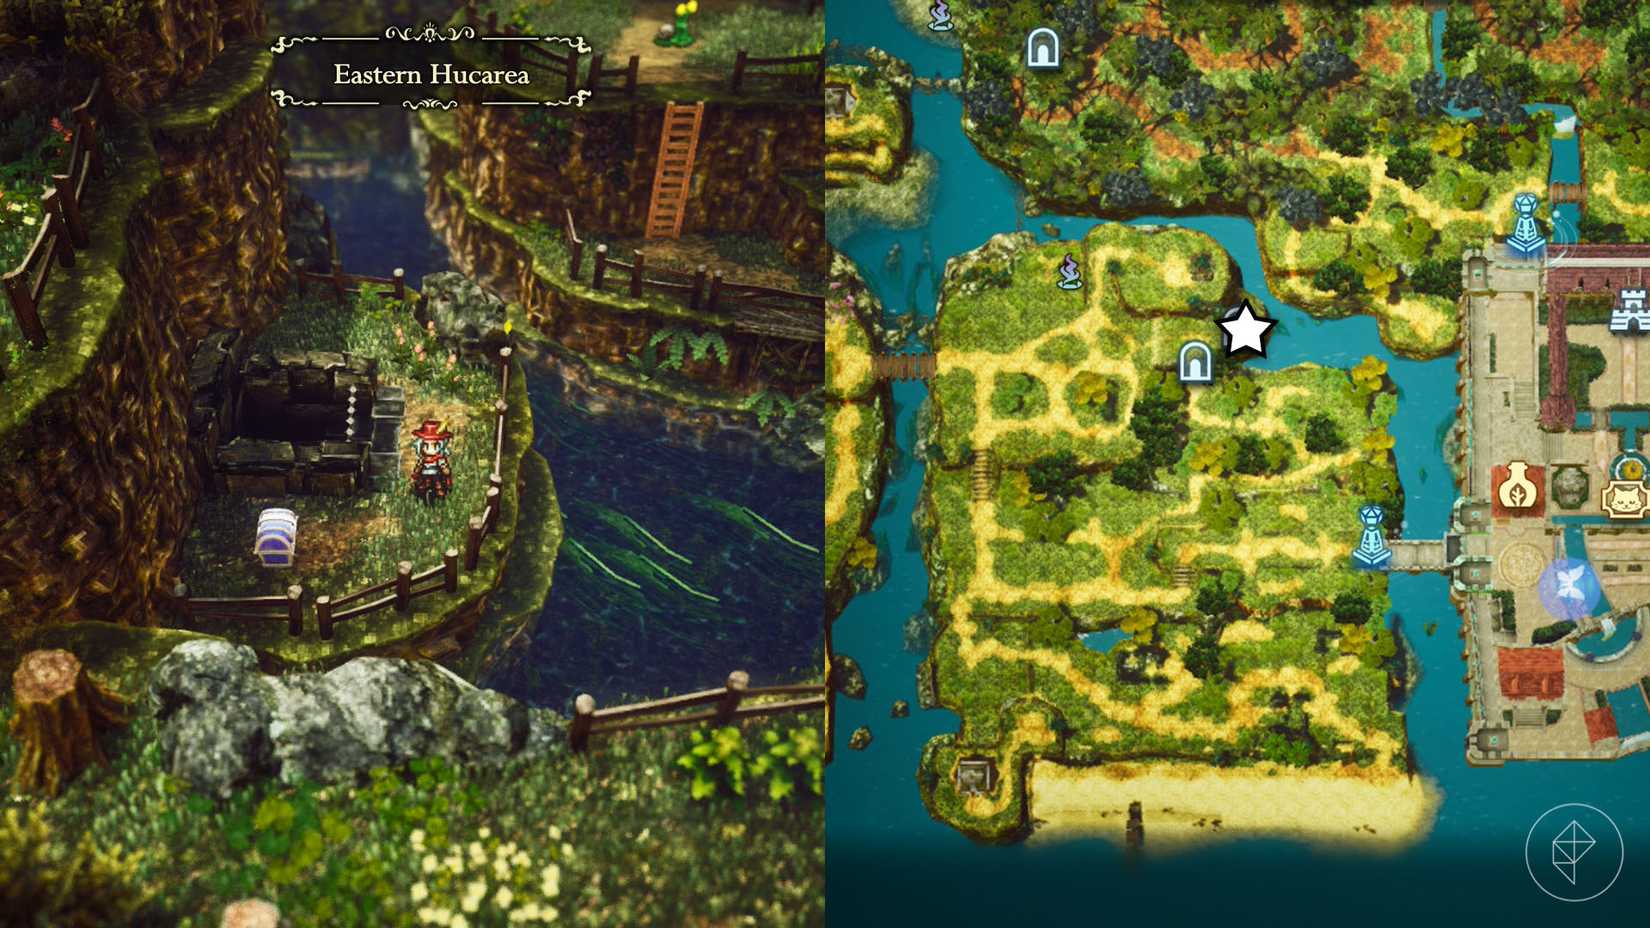
| Eddartrayl | Desert Exit | Use the Southern Caves – Desert Exit and head west to the area with the guidepost. |
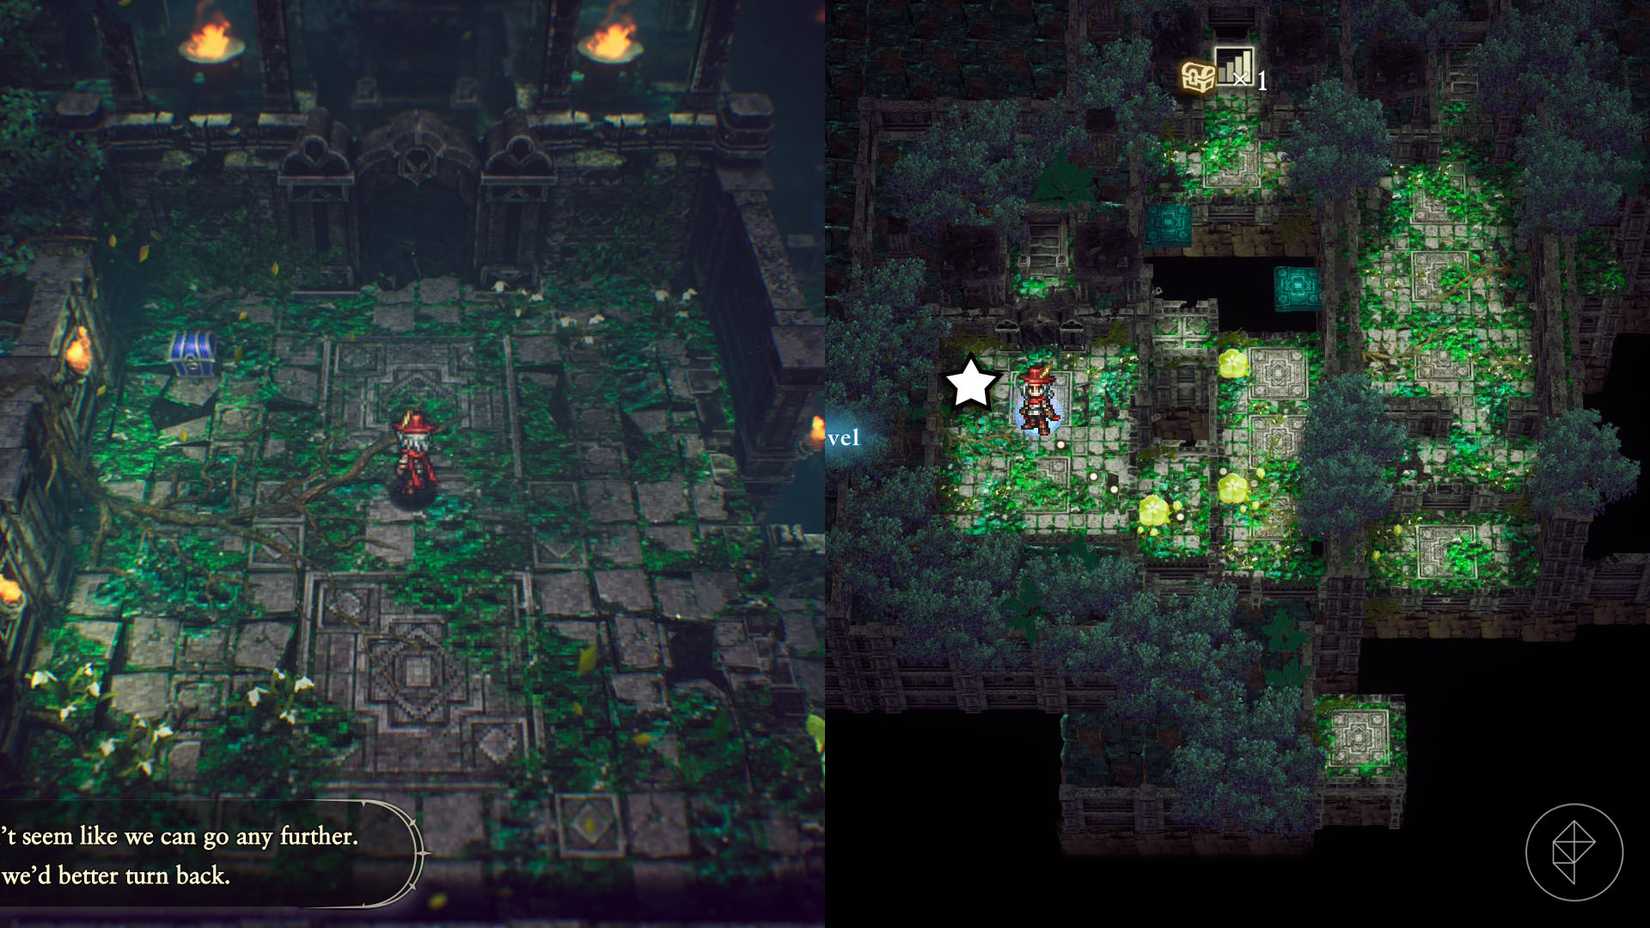
| Mist Ruins | Sublevel 2 | Hidden in a chest on the eastern side of the second sublevel. |
| Western Fields of Flon | Secret Shortcut 1 | Requires bombs from the Age of Reconstruction to access. |
| Forest Ruins | Upper Level | Use plant trampolines to reach the upper floor where the blue chest sits. |
| Westerea | Shrine of Life 9 | Found southwest of the Rainbow Lotus dungeon. |
| Westerea | Monster Trail 3 | Head north of the Rainbow Lotus dungeon, use the ladder, and take Secret Shortcut 6. |
| Westerea | Monster Trail 2 | Hidden in poisonous vegetation northeast of the Rainbow Lotus dungeon. |
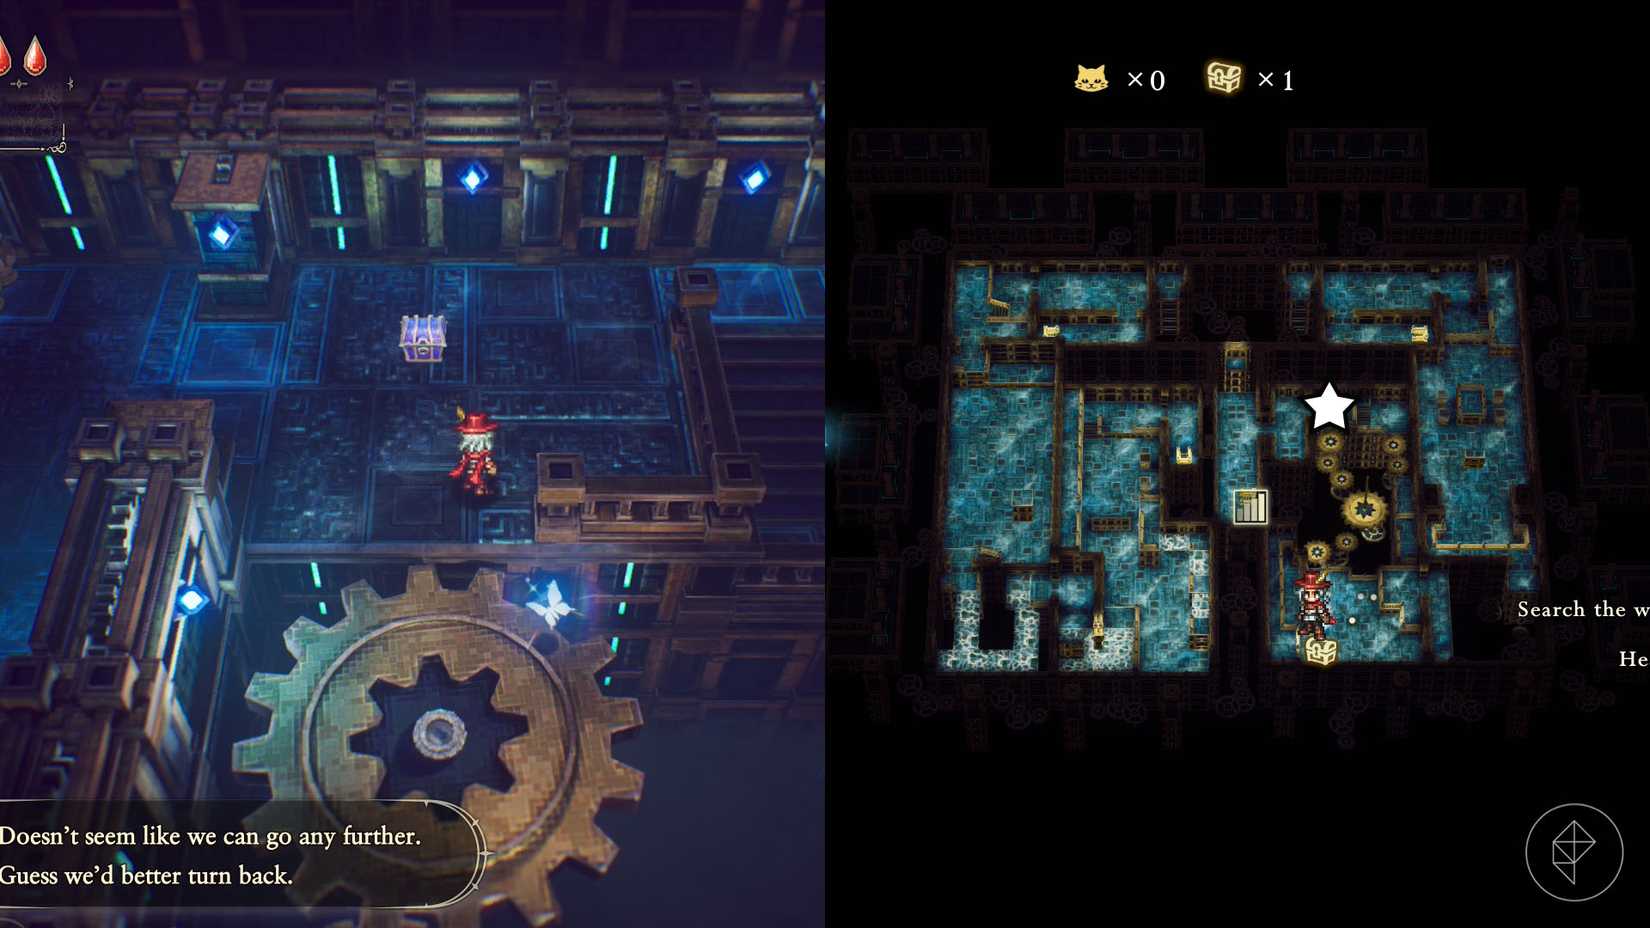
| Geared Ruins | Level 2 | Jump across the gear-shaped bridge on the eastern side. |
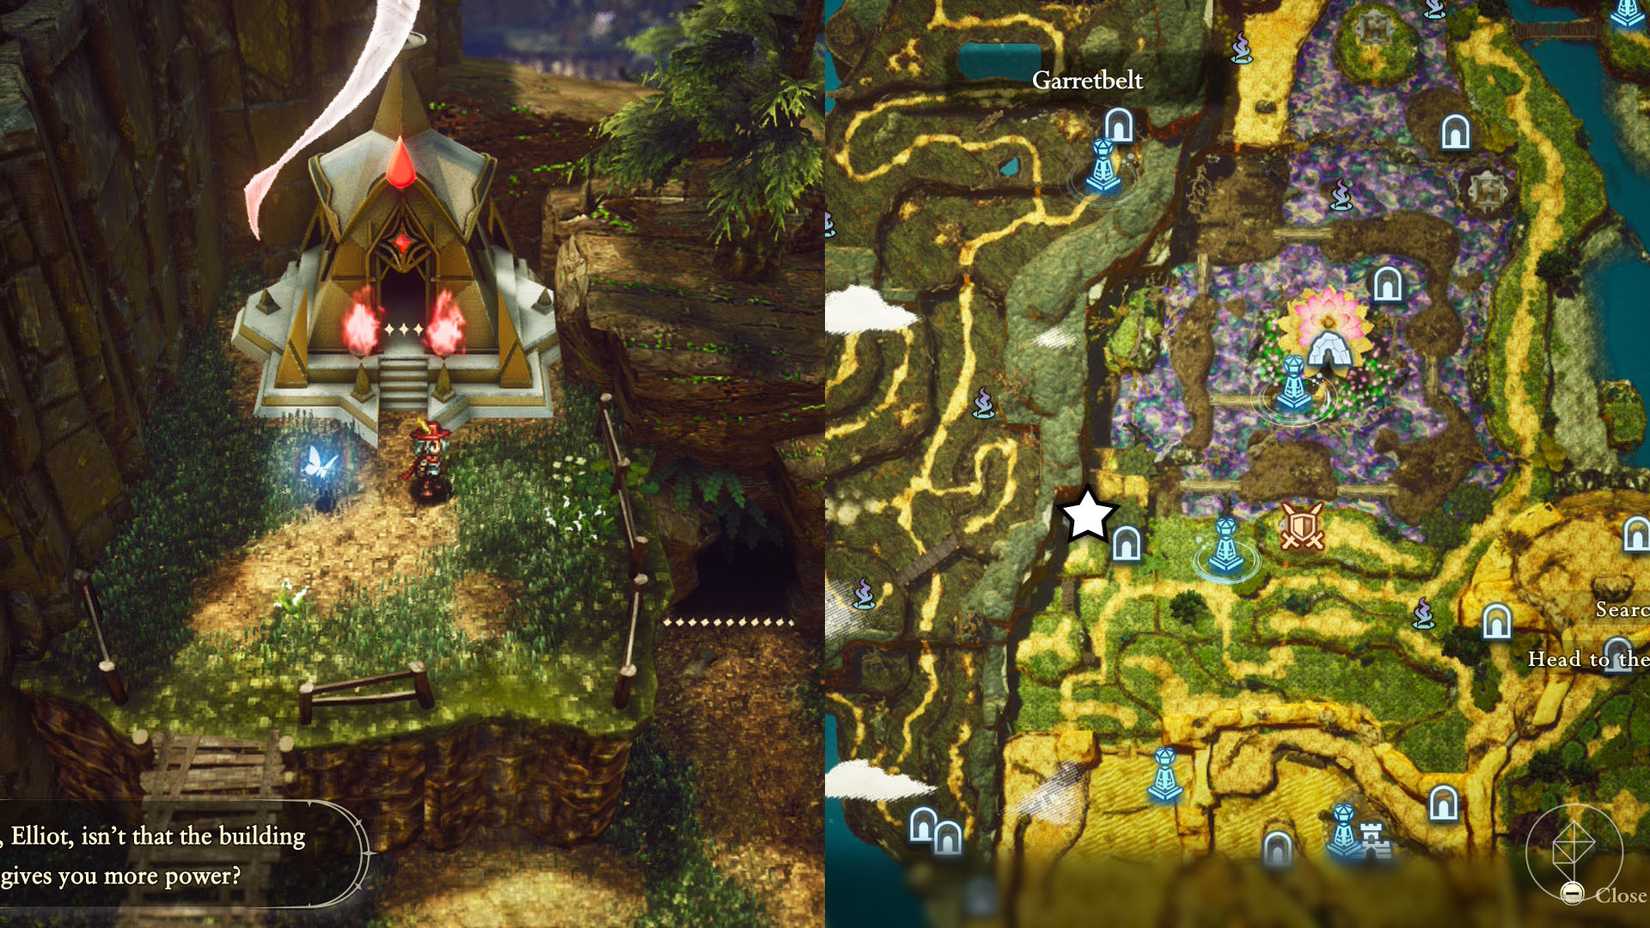
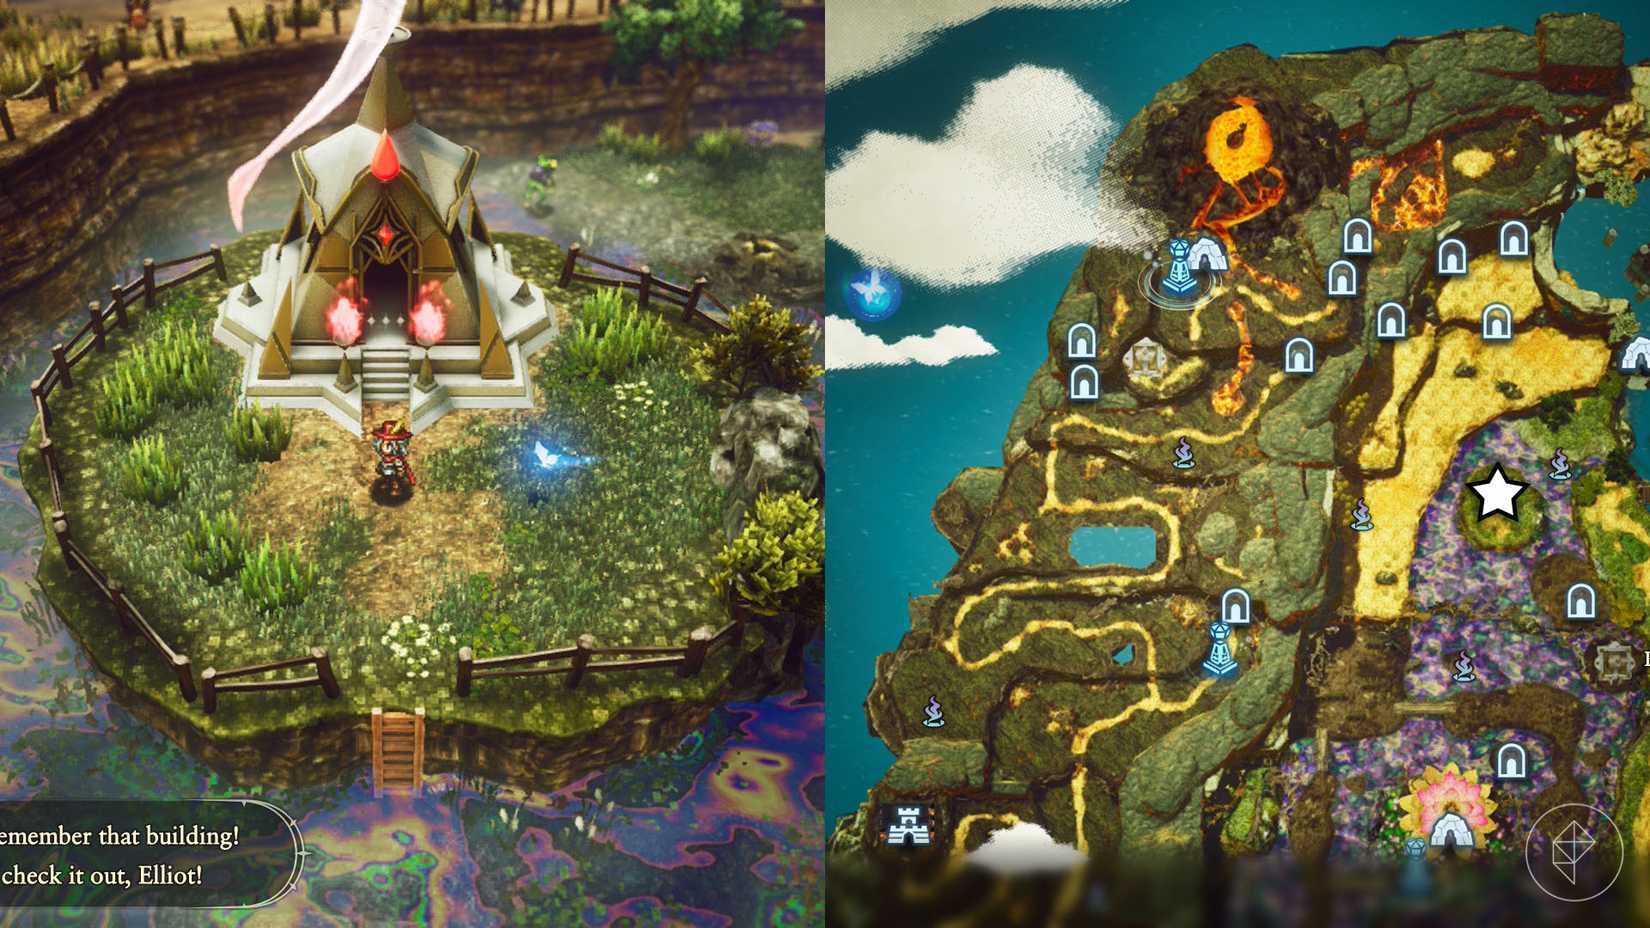
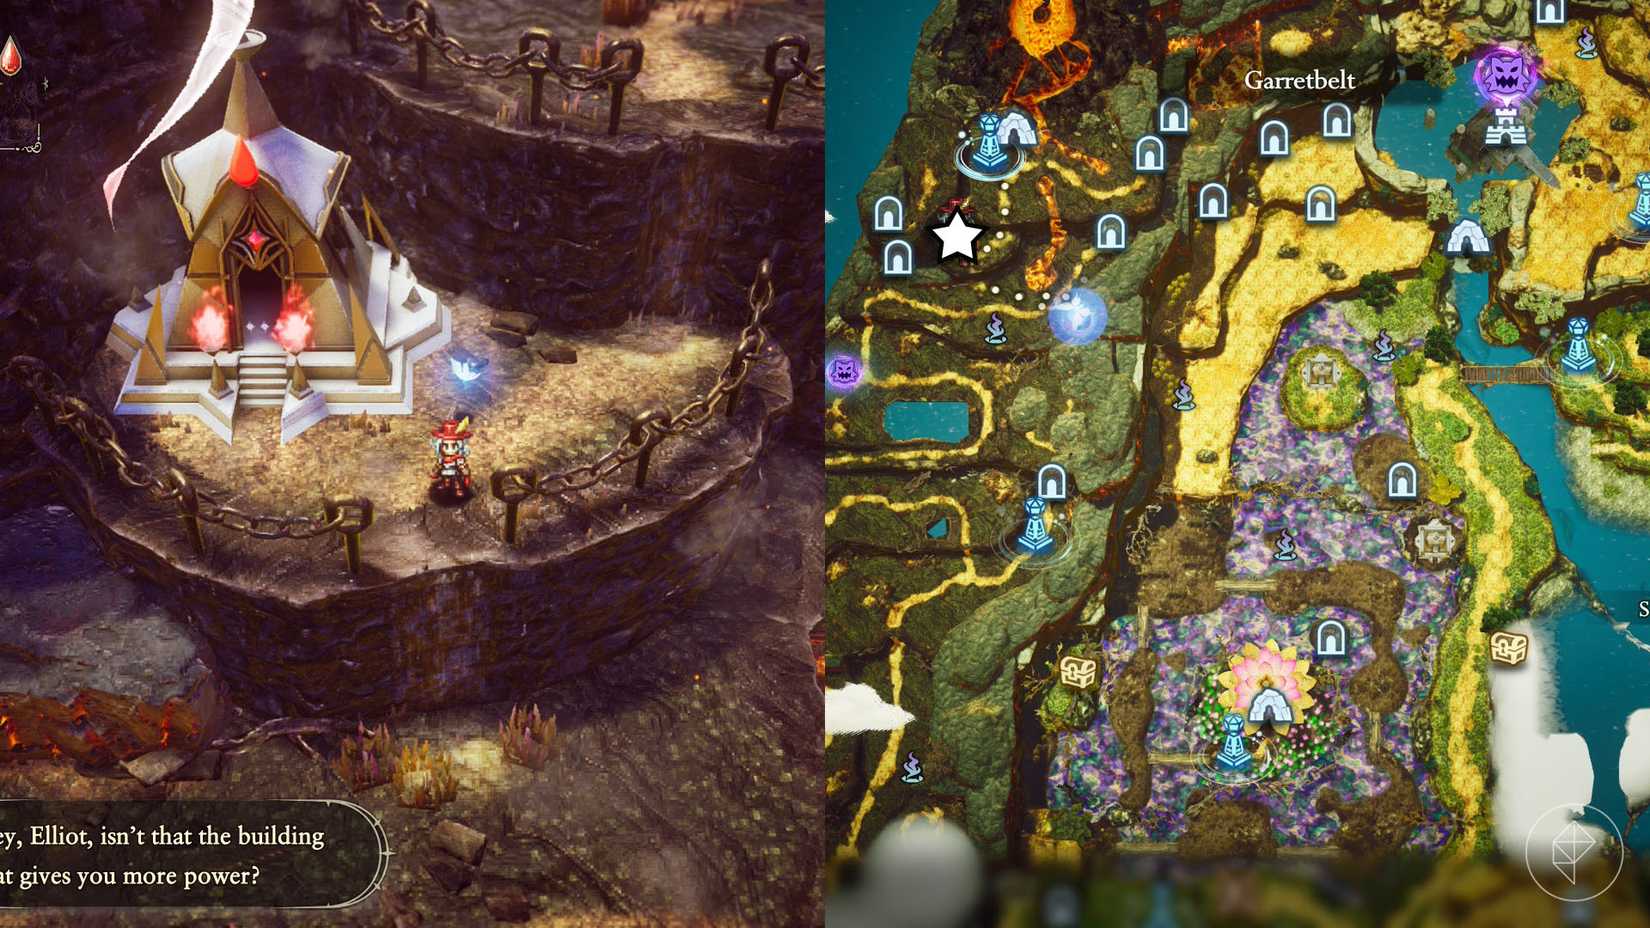
| Garretbelt | Mount Phoenix Approach | Drop off the edge south of the guidepost to find Shrine of Life 18. |
| Westerea | Northern Guidepost | Found east of the Northern Westerea guidepost. |
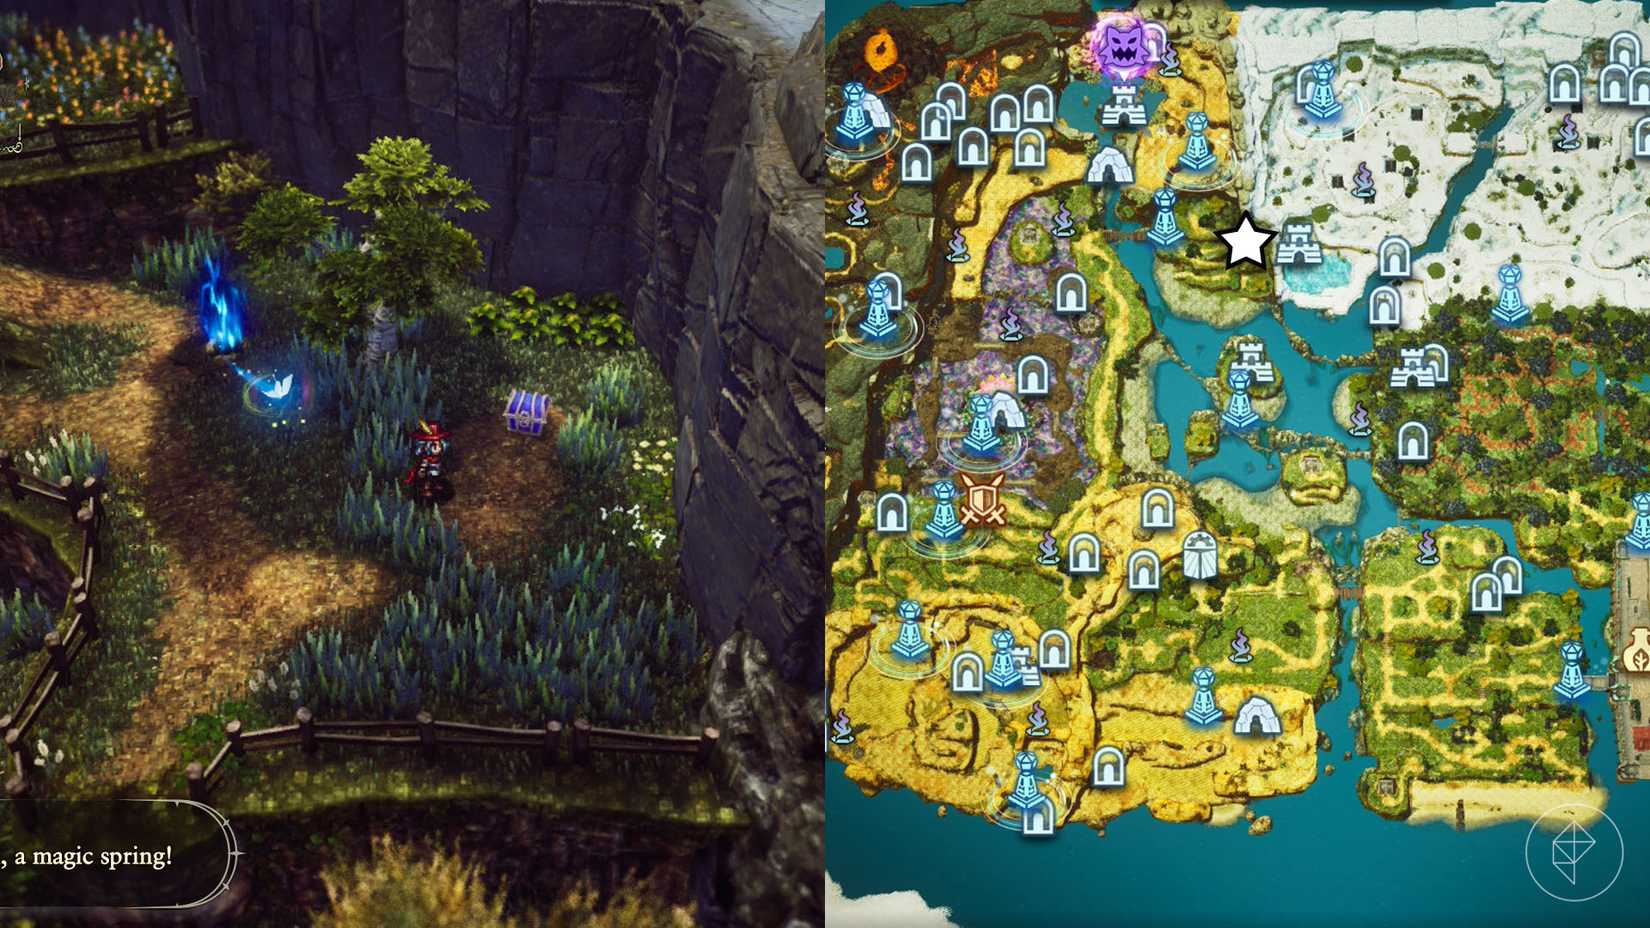
| Whiterea | Secret Shortcut 3 | Near the river in the Whiterea zone. |
| Whiterea | Shrine of Life 5 | North of the area, accessible via Secret Shortcut 3. |
| Neverwither | Southeast Region | Located in the far southeastern corner of the Neverwither map. |
| Westerea | Falls Caves | Swim north from the river on the left side of the Northern Tower guidepost. |
II. The Age of Reconstruction
The landscape shifts in this age, offering 18 Shards of Life. Mastery of the dive ability is mandatory for several of these, so do not feel discouraged if you cannot reach them immediately.
- Neverwither (Shrine 3): Requires the bomb ability to clear the entrance at Secret Shortcut 2.
- Neverwither (Northern Entrance): Destroy the boulders blocking the ladder west of the Littlehope Village guidepost.
- Whiterea (Shrine 4): Use the northwest entrance of Secret Shortcut 3.
- Whiterea (Northern Caverns): Use your spear to break vases and reach the chest on the east side of the cavern.
- North of Western Fields: Found on a small, isolated island.
- Western Fields of Flon (Shrine 2): Situated in the northern sector of the fields.
- Northern Tower: Align the two pillars in the room on the east side of sublevel one to create a bridge.
- Westerea (Southern Guidepost): Located immediately to the right of the guidepost.
- Eddartrayl (Ruins): Follow the upward path from the Geared Ruins.
- Eddartrayl (Shrine 8): Requires the bomb ability to open Secret Shortcut 4.
- Southern Caves: Requires the hammer to move the platforms leading to the chest.
- Neverwither (Lake): Swim to the other side of the small lake southeast of the Eastern Cave.
- Grandtree (Level 1): Drop from the southwest area of level two to reach this northern chest.
- Doorway Ruins: Found on a platform in a room with two mirrors on the west side of sublevel two.
- Garretbelt (Shrine 7): Accessed via the Western Caves.
- Westerea (Water Ruins): Requires the dive ability; access the platform via the ladder and jump across.
- Water Ruins (Surroundings): Located to the right of the main ruin site.
- Dragonpillar (Level 3): Easily visible upon entering sublevel three via the stairs.
III. The Age of Magic
As the world becomes more mystical, 13 Shards of Life become available. Many of these require the use of specific spells or advanced mobility tools.
- Eastern Fields: Northeast, right of the Secret Shortcut 1 entrance.
- Eastern Fields (Shrine 11): Located on the northern boundary.
- Eddartrayl (Shrine 13): Found on the southeastern side.
- Westerea (Shrine 12): Northeast of the Rainbow Lotus dungeon.
- Garretbelt (Monster Trail 5): Requires the key to the Western Caves.
- Garretbelt (Shrine 17): Near the Doorway Ruins on the southern side.
- Fire Ruins (Level 1): Accessed from sublevel one on the northwest side.
- Whiterea (Snowfield): Reachable via Secret Shortcut 3.
- Whiterea (Upper Snowfield): A secondary chest found in the same region.
- Ice Ruins (West Wing): Requires the "Vacuum" spell to clear the path.
- Whiterea (Shrine 15): Dive ability needed to enter Monster Trail 4 east of the Ice Ruins.
- Water Ruins (Sublevel 2): Activate the orbs to raise the water level, then navigate to the southern chest.
- Rainbow Lotus: Use the stairs from sublevel one to reach the elevated platform on the first level.
IV. The Age of Budding
The final 13 Shards of Life are found here. By this stage, you should have almost every ability unlocked.
- North of Western Fields: Use a bomb to break the wall, dive, and climb the ladder to the island.
- Western Fields (Shrine 19): Requires navigating around the northern side to reach the ladder.
- Desert Caves (Sublevel 2): Drop through the hole in the first level, then take the stairs in the northwest of sublevel one.
- Eddartrayl (Shrine 20): Accessed via the Southern Caves/Desert Exit.
- Western Fields (Southern Cave): Head north from the Desert Exit.
- Neverwither (Monster Trail 6): Enter the river southeast of the shrine to find the trail entrance.
- Dragonpillar (Sublevel 3): Use the "Warp" magic on the west side to bridge the gap.
- Whiterea (Northern Guidepost): Located on the northwest side of the map.
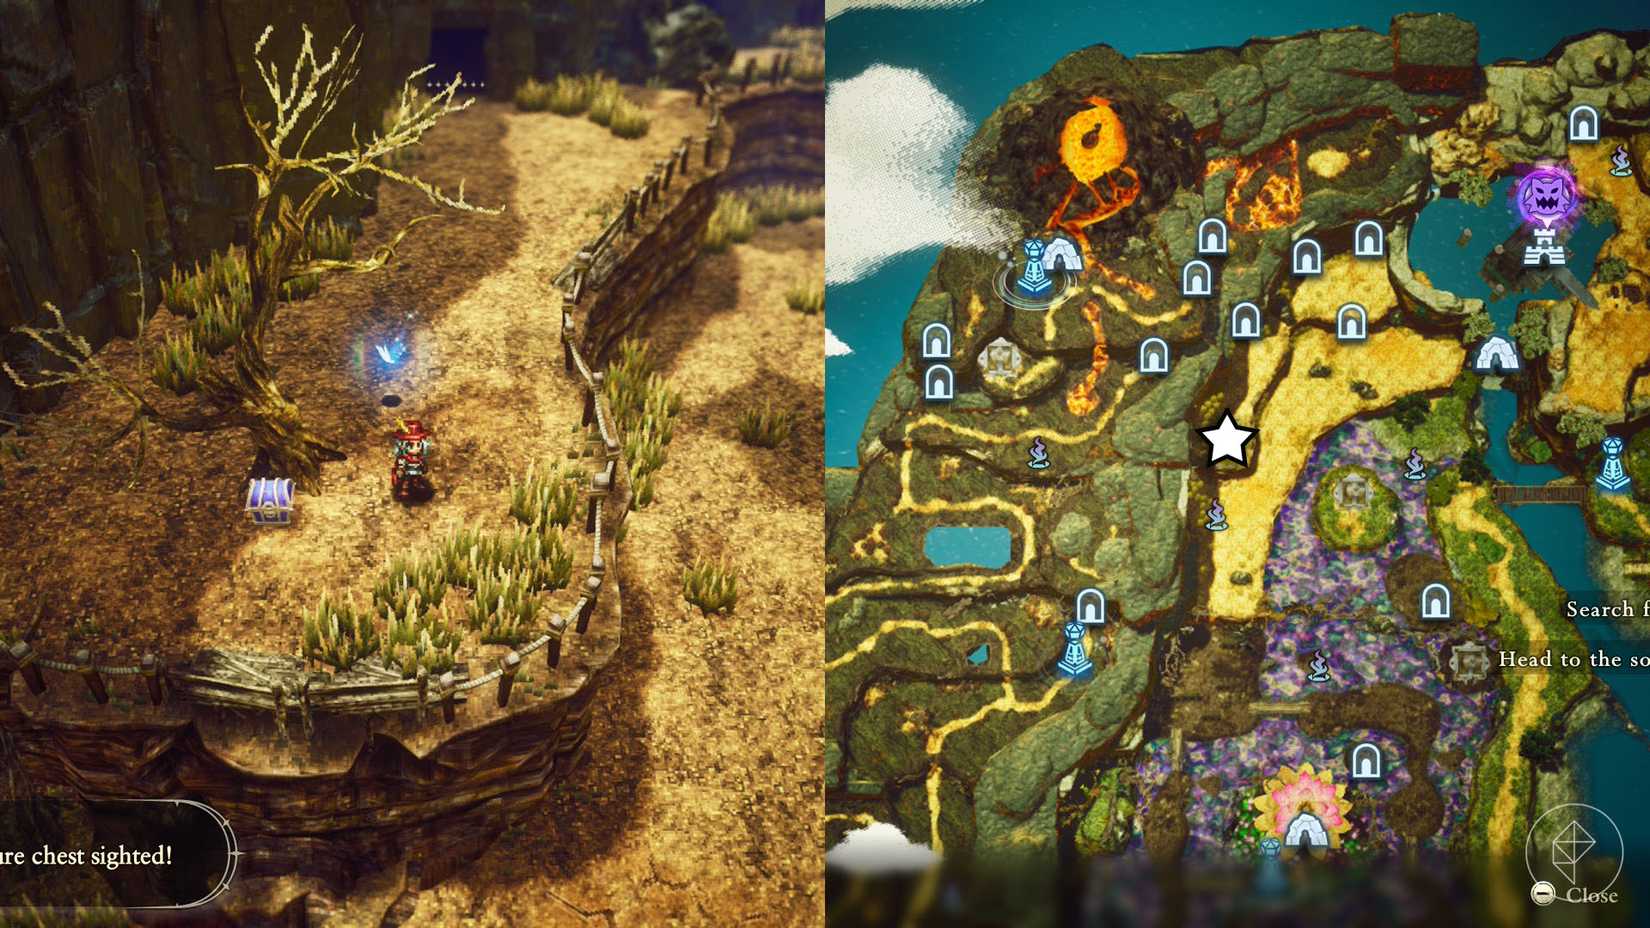
- Mount Phoenix (Level 1): Light the pillar to raise the bridge on the west side.
- Garretbelt (Shrine 24): Reachable via Monster Trail 5.
- Westerea (Shrine 22): Requires passage through Monster Trail 3.
- Water Ruins (Island): Found on the largest island southeast of the ruins.
- Garretbelt (Secret Shortcut 7): Southwest of Mount Phoenix.
Implications for Gameplay: Why Strategy Matters
The pursuit of these shards is not merely an exercise in completionism. Because The Adventures of Elliot scales its difficulty based on your progression, neglecting your health pool can lead to sudden "game over" screens during boss fights or traversal sections.
Players are advised to treat the Shard of Life collection as a primary objective. The "Age" system implies that the game is designed to be non-linear; if you find yourself hitting a wall, it is highly likely that a missing shard or an unacquired skill is the culprit. By systematically clearing these areas, you ensure that Elliot is prepared for the endgame challenges that test both reflexes and resource management.
Official Guidance and Community Support
The developers at Claytechworks have noted that the game’s environmental design is intended to reward those who observe their surroundings. Many of the "Secret Shortcuts" mentioned in this guide are subtle, often indicated by specific color palettes or ambient sounds.
If you are struggling to find a specific shard, the community suggests checking the The Adventures of Elliot official wiki or the interactive maps provided by gaming outlets like Polygon. These resources are invaluable, as they often include visual cues that help distinguish between similar-looking ruins.
Conclusion
Saving the world of The Adventures of Elliot requires patience, precision, and a keen eye for detail. By focusing on the acquisition of these 60 Shards of Life, you are not just ticking off boxes—you are fortifying Elliot for the final confrontation. Whether you are trekking through the scorching sands of the Age of Reconstruction or navigating the delicate paths of the Age of Budding, keep your eyes peeled for those distinctive red gems. Your survival depends on them.
