

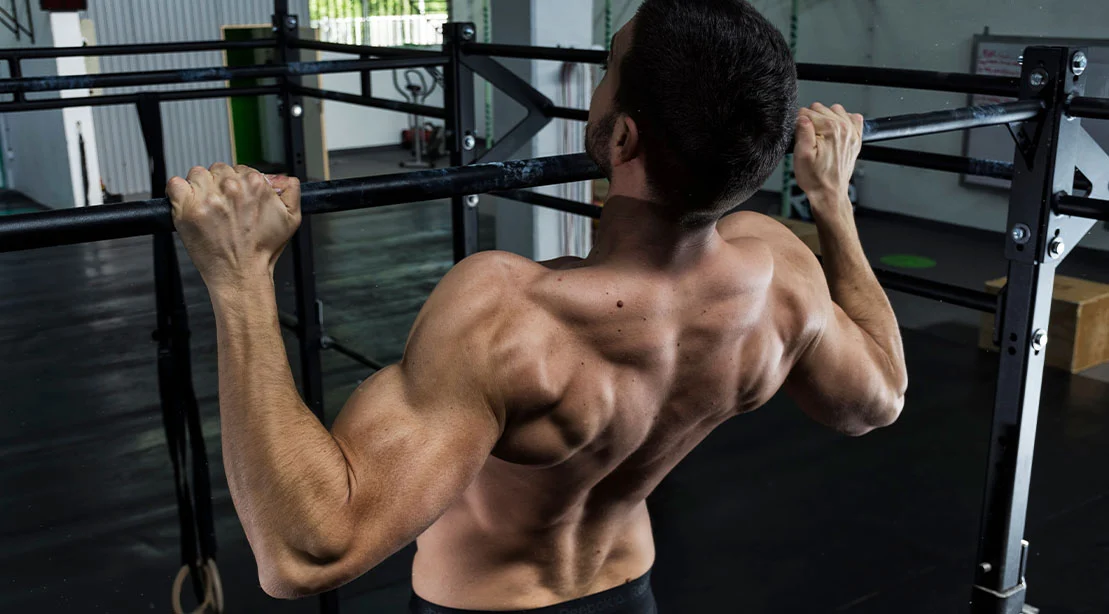
The pull-up and the chin-up are widely regarded as the "gold standard" of functional upper-body training. Unlike machine-based movements that stabilize the body for you, the pull-up forces the athlete to master their own center of gravity. These movements do more than just build a V-tapered physique; they are comprehensive tests of relative strength, grip endurance, and core stability.
Yet, despite their status as a foundational exercise, the vast majority of gym-goers perform them with suboptimal form. By rushing into the movement without a rigorous setup, lifters inadvertently treat the pull-up as a simple "arm exercise," neglecting the complex kinetic chain that allows for true muscle growth. To unlock the full potential of your lats, traps, and biceps, you must first master the art of the setup.
The Anatomy of a Flawless Repetition
The common mistake made by lifters of all levels is the belief that the repetition begins when the elbows bend. In reality, a high-quality pull-up or chin-up begins the moment your hands make contact with the bar. By the time you initiate the upward pull, your body should already be a cohesive, high-tension unit.
Effective pulling is an exercise in energy management. If you enter a set "loose," you lose force. Every degree of sag in your core, every lapse in shoulder engagement, and every bit of "swing" represents a leak in the energy your muscles are trying to produce. When you operate with full-body tension—engaging your glutes, bracing your core, and packing your shoulders—you convert the bar into a fixed anchor, allowing your lats to move your body weight with maximal efficiency.
Chronology of a Perfect Set: From Hang to Contraction
To achieve a perfect pull-up, you must move through a deliberate, seven-step sequence. This is not merely a "warm-up" routine; it is the fundamental protocol for safe and effective strength development.
Step 1: The Intentional Grip
Your connection to the bar dictates your neurological output. For the pull-up, adopt a pronated (overhand) grip, keeping hands slightly wider than shoulder-width. For the chin-up, use a supinated (underhand) grip at shoulder width. The key here is intent. Do not simply grab the bar; squeeze it as if you are trying to crush it. This "irradiation effect" sends a signal to your nervous system to prime the surrounding musculature, including the forearms and biceps.
Step 2: Optimizing Hand Position
While social media often showcases "wide-grip" pull-ups as the pinnacle of back training, biomechanics suggest otherwise. An excessively wide grip reduces your range of motion and puts the glenohumeral joint in a vulnerable, disadvantaged position. Aim for a grip just slightly wider than your shoulders. Focus on keeping your knuckles pointed toward the ceiling. This rotation helps set your lats in a better position for the pull.
Step 3: Generating Tension
Think of your hands as the primary point of stability. By "pulling the bar apart" as you hang, you activate the rotator cuff and the lats before you even move. This internal torque provides a stable platform for the movement.
Step 4: The Active Hang
This is the most critical technical step. Many lifters start from a "dead hang," where the shoulders shrug up toward the ears. While this is a common starting position, you must transition to an active hang before pulling. By depressing your scapulae (pulling your shoulder blades down into your "back pockets"), you lock the shoulders into a safe, strong position. If you cannot initiate from an active hang, you are likely relying on momentum rather than muscle.
Step 5: Core and Glute Bracing
If your legs are dangling like loose ropes, you are sacrificing power. By squeezing your glutes and bracing your core as if you are about to take a punch, you create a rigid "plank" of a body. This rigidity prevents swinging and ensures that 100% of the force generated by your back is used to pull your body toward the bar, rather than fighting to stabilize a swaying torso.
Step 6: Neutral Spine Alignment
Your head is heavy, and where it goes, your spine follows. Many lifters crane their necks to clear the bar, causing the lumbar spine to arch and the ribs to flare. This is a recipe for back pain. Maintain a neutral neck position, looking straight ahead or slightly upward, and focus on driving the chest toward the bar, not the chin.
Step 7: The Green Light Checklist
Before you begin the ascent, mentally confirm:
- Grip: Squeezing hard?
- Shoulders: Depressed (active hang)?
- Core/Glutes: Braced and tight?
- Neck: Neutral?
If these boxes are checked, you are ready to pull.
Supporting Data: Why Technique Matters
Recent biomechanical studies in strength and conditioning suggest that the activation of the latissimus dorsi is significantly higher when scapular depression (the active hang) is performed prior to elbow flexion. In a study involving electromyography (EMG) analysis of back exercises, researchers found that participants who maintained a "braced core" during pull-ups demonstrated a 15–20% increase in total volume capacity over the course of an eight-week program compared to those who used "kipping" or loose-body techniques.
The data is clear: strict form is not just for aesthetic perfection; it is a tool for increasing total workload, which is the primary driver of hypertrophy.
Professional Perspectives on Training Safety
According to elite strength coaches, the "chin-over-bar" mentality is one of the most common causes of rotator cuff impingement. "When an athlete forces their chin over the bar at the expense of their thoracic posture, they are essentially rolling their shoulders forward under load," says one industry expert. "We coach our athletes to treat the top of the movement as a ‘chest-to-bar’ touch. This forces the elbows to drive back and down, which is the natural path for lat engagement, effectively bypassing the shoulder-impingement trap."
Furthermore, medical professionals note that by keeping the spine neutral and bracing the core, lifters can avoid the common "lumbar hyperextension" seen in fatigued athletes, thereby protecting the spinal discs during the descent of the movement.
Implications for Long-Term Development
If you treat the pull-up as a shortcut-heavy exercise, you will reach a plateau quickly. You will hit a point where you cannot add more reps because your stabilizer muscles—the core, the rotator cuffs, and the forearms—are failing to support your primary movers.
By adopting the professional setup detailed above, the implications for your training are twofold:
- Injury Prevention: By controlling the descent and the setup, you reduce the strain on the elbow tendons (common in "golfer’s elbow" and "tennis elbow") and shoulder joints.
- Hypertrophy and Strength: When you eliminate momentum, you force the target muscles to do the work. A set of five perfectly performed, strict-tempo pull-ups is metabolically and muscularly superior to a set of ten "loose" reps where the body is flailing.
Final Thoughts: The Path to a Wider Back
The pull-up and chin-up are tests of absolute control. The lifters who possess the most impressive backs are rarely the ones who swing the most; they are the ones who understand how to create tension from the fingertips to the toes.
Stop treating the pull-up as a race to get your chin over the bar. Start treating it as a total-body strength movement. Master the active hang, maintain the brace, and let your body work as a single, powerful unit. When you respect the setup, the growth will follow. Remember: the first rep starts before the pull, and the gains start with the setup.
 Lina Hope
 rifanmuazin
 Laily UPN
