

The barbell overhead press is widely regarded in the strength community as a "truth teller." Unlike the bench press, which provides the stability of a bench, or machine-based movements that guide your path, the strict overhead press demands absolute control. There is no assistance from the lower body and, once the bar leaves the shoulders, the lifter is locked in a direct confrontation with gravity. It is, quite simply, you versus the barbell.
However, the very characteristic that makes the barbell an elite tool—its rigid stability—can also be its most significant limitation. By locking both hands into a fixed, pronated position, the barbell restricts the natural movement of the wrists. For many lifters, this lack of freedom can transform a foundational movement into a source of chronic joint discomfort. When the wrists become the "weakest link" in the kinetic chain, power output drops, and the risk of injury rises.
Understanding why this occurs and knowing how to adjust your training is essential for long-term athletic development. This report explores the mechanics behind barbell-induced wrist pain, provides actionable form corrections, and outlines professional-grade alternatives for those who need to pivot without sacrificing their gains.
The Mechanics of Discomfort: Why the Barbell Hurts
To understand why the overhead press causes wrist pain, one must look at the "stack." The ideal overhead press features a vertical alignment where the weight is supported directly over the bones of the forearm. When this alignment is compromised, the wrist is forced into hyperextension to compensate for the weight’s center of gravity.
1. The Barbell Placement Paradox
If the barbell is allowed to roll toward the fingers during the setup or the concentric phase of the lift, the lever arm between the weight and the wrist joint increases. To prevent the bar from slipping, the wrist must extend further backward. This position not only places excessive shear force on the carpal bones but also dissipates the force intended for the deltoids.
2. The Loss of the Vertical Stack
A powerful press requires the wrists to be stacked directly over the elbows. If the elbows flare excessively or the grip is too wide, the forearms lose their verticality. When the forearms are angled, the wrist is forced to act as a hinge rather than a pillar. While a slight degree of extension is physiologically acceptable in the rack position, chronic pain is a clear indicator that the "stack" has failed.
3. Grip Width and Anatomical Individuality
"Just outside shoulder width" is a common mantra in strength training, but it is not a universal law. Anatomy varies significantly from person to person. A grip that is too wide can force the elbows into an unnatural flare, while a grip that is too narrow can cause the barbell to drift forward, creating a path that puts unnecessary strain on the delicate structures of the wrist.
4. The Limitations of the Fixed Path
The barbell is a straight, rigid tool. While this is excellent for tracking progression, it provides zero room for the wrists, elbows, and shoulders to navigate their own natural, individual "pressing groove." For lifters with specific anatomical constraints or previous injuries, the rigidity of the bar can become a barrier to progress rather than a catalyst for it.
Chronology of Correction: A Step-by-Step Approach
If you are experiencing pain, do not immediately discard the movement. Before pivoting to alternatives, it is crucial to perform a diagnostic audit of your form. Follow this sequence to recalibrate your press.
Phase 1: The Foundation (Hand Placement)
Shift the barbell deeper into the heel of your palm. By placing the bar closer to the forearm bones, you shorten the lever arm and allow your skeleton to support the weight rather than your ligaments. When you grip the bar, imagine trying to "break" it by rotating your hands outward.
Phase 2: The Verticality Audit
Check your alignment. From the front, your forearms must be perfectly vertical. If you see them angling inward or outward, adjust your grip width by one finger-width at a time until you find the point where your elbows track comfortably beneath the bar.
Phase 3: The "Knuckles to the Ceiling" Cue
A simple yet transformative cue is to point your middle knuckles toward the ceiling throughout the entire movement. This prevents the bar from rolling back into the fingers and encourages a "neutral" wrist angle that keeps the load stacked safely over the forearm.
Phase 4: Load Management
Form issues are often masked by submaximal weights, only to reveal themselves when the intensity increases. If you find your wrists hyperextending only at higher percentages of your 1-rep max, strip the weight back. Rebuild your movement pattern with a lighter load, focusing on perfect stacking, and progress only as your technique remains pristine.
Supporting Data: Why Alternatives Work
When the barbell continues to cause pain, it is time to pivot to movements that offer more "degrees of freedom." Scientific consensus in sports biomechanics suggests that a neutral or semi-neutral grip significantly reduces the load on the distal radioulnar joint. By allowing the hands to rotate naturally, these exercises distribute the force across the entire shoulder girdle, alleviating the specific stress points that cause wrist pain.
5 Wrist-Friendly Alternatives for Shoulder Hypertrophy
If your wrists refuse to cooperate with the barbell, these five movements are superior replacements that offer similar muscle-building stimuli while prioritizing joint health.
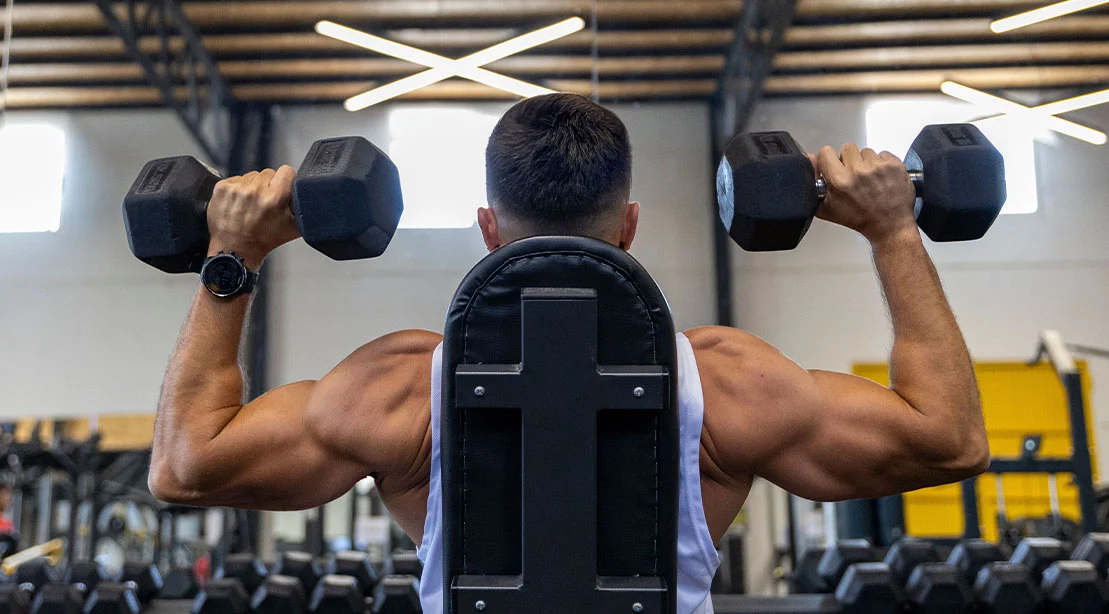
1. The Neutral-Grip Dumbbell Overhead Press
This is the gold standard for those with wrist issues. By holding the dumbbells with palms facing each other, you eliminate the pronation required by a barbell. This allows the wrists to remain in a natural, neutral position, permitting the shoulders to follow their own path.
- Target: Anterior and medial deltoids.
- Tip: Keep the dumbbells stacked directly over your wrists throughout the full range of motion.
2. Half-Kneeling Landmine Press
The landmine press is a bridge between vertical and horizontal pressing. The angle of the barbell in a landmine setup allows for a more natural, semi-neutral wrist position. Furthermore, the half-kneeling stance requires significant core engagement and anti-rotation, turning a shoulder exercise into a total-body movement.
- Target: Anterior delts, triceps, and serratus anterior.
- Tip: Squeeze the glute on the kneeling side to stabilize your pelvis and protect your lower back.
3. Bottoms-Up Kettlebell Press
This is the ultimate test of grip stability. By holding the kettlebell upside down, you force the stabilizer muscles in your forearm to fire intensely to keep the weight from tipping. If your wrist is not perfectly stacked, the weight will immediately fall, providing instant feedback.
- Target: Deltoids and rotator cuff stabilizers.
- Tip: "Crush" the horn of the kettlebell to increase irradiation and muscular tension.
4. High-Incline Dumbbell Chest Press
By setting an adjustable bench to a 60-to-75-degree angle, you transition the emphasis from the pectorals to the shoulders. This variation mimics the overhead press path but provides the stability of a bench, allowing you to focus on the contraction of the deltoids without worrying about balance.
- Target: Anterior delts and upper chest.
- Tip: Ensure your elbows do not flare beyond 45 degrees to protect the shoulder capsule.
5. Neutral-Grip Machine Shoulder Press
There is no shame in utilizing machines. Modern machines with neutral-grip handles are specifically designed to reduce joint stress. By removing the need for stabilization, you can safely push your deltoids and triceps to total muscular failure, which is often the missing link in hypertrophy.
- Target: Entire shoulder complex.
- Tip: Adjust the seat height so the handles start at the top of your shoulders to avoid over-stretching the joints in the bottom position.
Implications for Long-Term Training
The pursuit of strength is a marathon, not a sprint. The barbell overhead press is a phenomenal exercise, but it is not the only way to build a formidable physique. If a specific movement causes pain, continuing to perform it in the name of "toughness" is not a sign of dedication; it is a lack of training intelligence.
By incorporating these form fixes and alternatives, you ensure that you can continue training your shoulders through all phases of your career. Whether you cycle these variations into your program to allow for recovery or adopt them as permanent staples, the goal remains the same: to stimulate the muscle, not destroy the joint.
Remember, the most effective training program is the one you can perform consistently. There can, and should, be gain without pain. By diversifying your toolset, you protect your longevity and ensure that your progress continues for years to come.
 rifanmuazin
 Laily UPN
