

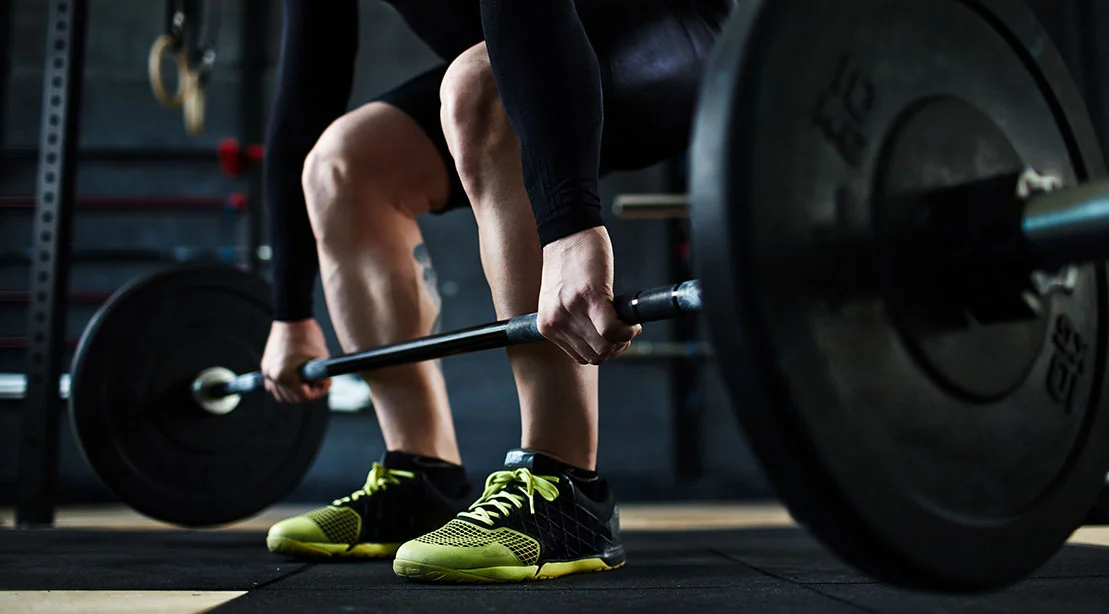
For many strength athletes, the quest for a personal record in the deadlift is defined by sheer effort—the grit required to lock out a heavy weight. However, elite performance is rarely born from brute force alone; it is forged in the silent, critical moments before the bar leaves the floor. If your starting position is compromised, your potential for growth is fundamentally capped.
Deadlift performance issues almost exclusively originate at the bottom of the movement. Whether it is a rounding lumbar spine, a bar that drifts forward, or an inability to generate tension, these setup errors turn a technically demanding lift into a biomechanical liability. To unlock your true strength potential, you must learn to "own" the bottom position through a synthesis of mobility, stability, and intent. With guidance from renowned strength coach Matt Wenning, we examine how to diagnose your setup and utilize targeted mobility drills to build a bulletproof starting position.
The Anatomy of a Flawless Setup
The deadlift is a symphony of coordinated effort. It requires sufficient mobility in the hips, hamstrings, adductors, ankles, and thoracic spine. Yet, mobility is merely the prerequisite. To truly succeed, a lifter must possess the stability and body awareness to create profound tension.
Diagnostic Checklist: Can You Own the Position?
To determine if your starting position is sound, load a barbell with a manageable weight—a single 45-pound plate on each side is sufficient. Assume your deadlift stance with the bar positioned over your midfoot. Hinge at the hips, grip the bar, and generate maximum tension as if you are milliseconds away from the pull. Hold this position for three seconds without lifting the weight.
While holding, assess the following:
- Spinal Neutrality: Is your lower back rounded, or is it flat and supported by your core?
- Bar Proximity: Does the bar remain in contact with your shins, or has it drifted forward?
- Hamstring Tension: Can you feel the load in your hamstrings, or are your quads taking the brunt of the weight?
- Hip Height: Are your hips in a stable hinge position, or have they dropped into a squat-like posture?
If you cannot maintain these positions, you have identified a structural or technical bottleneck that must be addressed before adding more weight to the bar.
Core Components for a Clean Pull
To understand why these errors occur, one must understand the mechanical requirements of the deadlift.
Hip Flexion and Pelvic Control
The hips must possess enough flexion to allow the torso to descend toward the bar. If mobility is limited here, the body will instinctively "steal" that range of motion from the lumbar spine, leading to the dreaded "cat back" under heavy loads.
Hamstring and Adductor Mobility
These posterior chain muscles are the engines of the deadlift. They require sufficient length to allow for a proper hinge. If they are tight, you will struggle to find a stable hip position, often causing the knees to shoot forward or the back to compensate.
Thoracic Mobility and Lat Engagement
The upper back is the anchor of the lift. A mobile thoracic spine allows for a neutral, braced position that prevents the shoulders from collapsing. Furthermore, proper lat engagement—often cued as "squeezing an orange in your armpits"—creates the stiffness necessary to transfer force from the legs through the bar.
Identifying and Correcting Common Setup Mistakes
Often, what appears to be a mobility issue is actually a technical error. Before embarking on a rigorous mobility routine, ensure your mechanics are sound.
The "Squatting" Error
Many novice lifters drop their hips too low, turning a deadlift into a hybrid squat. This pushes the knees forward, which physically forces the bar away from the midfoot, killing your leverage and erasing hamstring tension.
- The Fix: Prioritize the hinge. Initiate the movement by pushing the hips back rather than sitting down. Feel the tension in the hamstrings before the bar leaves the floor.
Excessive Lower Back Rounding
While some elite powerlifters utilize a degree of spinal flexion, it is a high-risk technique for the majority of trainees.
- The Fix: Improve hip mobility to allow for a deeper reach. If you struggle to maintain a flat back, utilize rack pulls or block pulls to train the hinge pattern at a height that allows for perfect form while you build the necessary range.
The Drift Factor
A bar that drifts away from the shins creates a longer lever arm, forcing the lower back and hips to work exponentially harder. This is almost always a failure of lat tension.
- The Fix: Engage your lats before the pull. Think of pulling the bar into your shins rather than just up.
5 Mobility Exercises to Own the Bottom Position
If you have mastered the technique but still feel restricted, incorporate these five drills into your training protocol to unlock your range of motion.
1. Chair Sumo Deadlift
Coach Matt Wenning recommends this drill for those struggling to find the proper hip hinge. By using a chair as a tactile target, you learn to sit the hips back while maintaining a wide, sumo-style stance. This develops the hip abduction and external rotation required for a powerful pull.
- Programming: 2–3 sets of 6–10 reps.
2. Half-Kneeling Hamstring Mobilization with Ankle Rocker
This dual-purpose drill addresses both the hamstrings and the ankles. By moving through a half-kneeling position, you lengthen the hamstrings while simultaneously improving ankle dorsiflexion, which is vital for keeping your shins in the correct position relative to the bar.
- Programming: 1–2 sets of 6–10 reps per side during warm-ups.
3. Goblet Prying Squat
Using a kettlebell as a counterweight, sink into the bottom of a deep squat and use your elbows to pry the knees apart. This stretches the adductors and hips, creating the freedom of movement required to reach the bar without lumbar compensation.
- Programming: 1–2 sets of a 30-second hold.
4. Rockback Breathing with Double-Elbow Reach
Overactive lats can sometimes hinder the ability to find a neutral, braced spine. This drill uses rhythmic breathing in a rockback position to reduce unwanted tension in the lats and lower back, allowing you to establish a more efficient rib-to-pelvis alignment.
- Programming: 2 sets of 5 breaths early in the warm-up.
5. Straight-Arm Band Pulldown into Deadlift Hold
This drill bridges the gap between mobility and strength. By using a resistance band to simulate the bar, you learn to activate your lats while hinging. It reinforces the critical habit of pulling the bar into your body, ensuring the lats remain "on" throughout the entire lift.
- Programming: 2–3 sets of 5–8 controlled reps.
Implications for Future Performance
The deadlift is not merely a test of strength; it is a test of structural integrity. By treating the setup as a skill to be mastered rather than a preamble to be rushed, athletes can drastically reduce their risk of injury while increasing their ceiling for weight.
Implementing these mobility drills creates a "bottom-up" improvement cycle. As your hip mobility increases, your spine becomes more protected; as your lat tension improves, your bar path tightens; and as your stability grows, your ability to exert force through the floor becomes more efficient.
Ultimately, the goal is to find the strongest position for your unique anatomy. Do not force your body into a "textbook" position that ignores your structural limitations. Instead, use these tools to refine your range of motion and solidify your tension. Remember: the deadlift does not start when the bar moves—it starts with the position you create before you ever apply force to the steel. Take the time to master that moment, and the weight will follow.
 Lina Hope
 rifanmuazin
 Laily UPN
